Installing a stormwater pit is one of the most effective ways to manage rainwater runoff around your property. Especially a stormwater pit in Brisbane with our heavy downpours. What are you dealing with?:
- Pooling water on your lawn?
- Minor flooding near pathways?
- Water washing into your garage?
No matter what drainage issue is giving you a headache today, a properly installed stormwater pit can help protect your home from water damage while keeping your drainage system compliant and effective.
In our exclusive guide, the friendly team at Brisbane Drain Cleaning will walk you through the process – step by step. From understanding what a stormwater pit actually does, to digging, fitting, and connecting your drainage system – we’ve got it all right here.
What is a stormwater pit (And why do you need one?)
Before diving into the how-to, let’s clarify what what-is:
- How does a stormwater pit work?
- And what even is a stormwater pit in the first place?
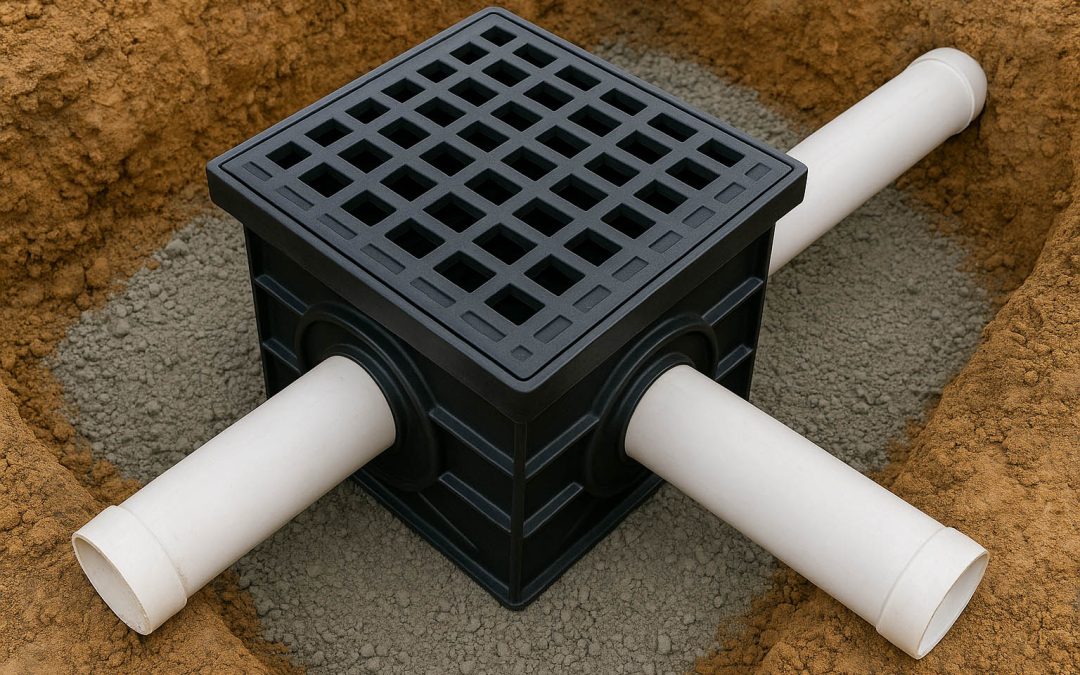
A stormwater pit is a container – often plastic or concrete – installed below ground to collect and temporarily hold excess rainwater. It acts as a catchment basin, helping water drain efficiently through underground pipes and preventing surface flooding. You’ll usually find them at low points in driveways, gardens, or lawns – especially in flood-prone Brisbane suburbs.
But how does a stormwater pit work in real life? The pit captures runoff, filters out debris, and directs the water into connected stormwater pipes. This allows the system to handle Brisbane’s notoriously heavy rain events without ever backing up.
While that might sound straightforward, getting it right is more complex than it seems. You’ll need the correct size, specifications, material, filtration setup, and installation method to match your property’s layout and the intensity of local storms. It’s also wise to invest in a professional drain inspection beforehand, just in case the issue is something more common, like a stormwater drain blocked by tree roots. That way, you won’t spend on a pit you don’t actually need.
Professional Stormwater Pit Installation Guide
Any work that involves altering or installing new drainage systems — including connecting to the council’s stormwater network — must be carried out by a licensed plumber. Below is an overview of how a qualified plumber approaches a stormwater pit installation to ensure it’s effective, compliant, and built to last.
1. Plan the installation
A plumber begins with a thorough site assessment, determining the right pit size, placement, and depth to match the property’s drainage needs.
- Identify low points where water pools
- Check council regulations and plumbing codes
- Select a pit with suitable capacity
- Mark connection points for pipework
2. Choose the right pit type
Plumbers select between plastic or concrete pits based on load requirements, location, and long-term durability.
- Ensure the pit is UV-resistant and compliant
- Check for pre-cut entry points or suitable drill guides
- Fit a grate cover suited to the installation site (e.g. heavy-duty for driveways)
3. Mark & excavate the area
Licensed plumbers mark the exact dimensions and excavate to the correct depth, allowing for a stable gravel bedding layer.
- Accurate depth ensures correct drainage gradient
- Adequate clearance prevents pit movement during backfill
4. Prepare the pit base
A stable base is compacted and levelled to prevent sinking or shifting.
- Crushed rock or gravel base
- Compacted using professional tools
- Checked with a spirit level from multiple angles
5. Position the pit
The pit is lowered into place so that inlet and outlet points align with pre-planned trenching.
- Avoid dragging to prevent damage
- Ensure it sits flat and level
6. Connect drainage pipes
Only a licensed plumber can legally connect the pit to the stormwater system.
- Cut or open entry points precisely
- Create watertight joins with approved PVC fittings and seals
- Maintain a minimum fall of 1:100 for correct flow
7. Backfill around the pit
Plumbers backfill with gravel or sand in layers, compacting to prevent movement. The top layer is finished to match surface requirements.
8. Test the drainage system
Before finalising the job, plumbers run water through the system to check flow and ensure there are no leaks or blockages.
9. Maintain your pit
Regular maintenance is essential. Plumbers recommend seasonal inspections and professional cleaning if blockages form.
10. When to engage a plumber
If your installation involves new drainage work, council connections, or large-scale water management, it must be done by a licensed professional. This ensures safety, compliance, and a system that works efficiently for years to come.
Need help with stormwater pit installation?
Whether you’re taking on a backyard DIY or you’re unsure how to install a stormwater pit that meets council specs, we’re here to help. Brisbane Drain Cleaning specialises in stormwater drainage solutions tailored to Brisbane homes and soil conditions. We’ll ensure your stormwater system is built to last – and works when you need it most.
Reach out today for expert help with your stormwater pit installation – or book your service online now.
Related posts:
 7 Things You Must Know About Stormwater Drain Responsibility
 How To Get Rid Of Drain Flies In 5 Different Ways
 How To Unblock Drains Outside (And When You Need A Plumber)
 43 (Yes, 43) Real Causes Of Blocked Drains
 How To Use An Electric Eel Drain Snake Cleaner
 The Smell Test: Ranking Smelly Drains (And How To Fix Them)